Are you ready to experience the coffee-making magic of a Moka Pot? Whether youre a coffee connoisseur or just getting started with making your own espresso, making coffee in a Moka Pot is a unique and delicious way to enjoy your favorite coffee beverage.
In this step-by-step guide, well show you how to use a Moka Pot for the first time, from what supplies youll need to the five easy steps to making an amazing cup of espresso.
Lets get started!
Short Answer
To use a moka pot for the first time, start by filling the lower chamber with cold water.
Then, fill the funnel-shaped filter with finely-ground coffee, making sure not to overfill it.
Place the pot on the stove over medium heat and let it come to a boil.
As soon as you hear the distinctive gurgling sound, remove the pot from the heat to avoid over-extraction of the coffee.
Finally, pour the coffee into your cup and enjoy!
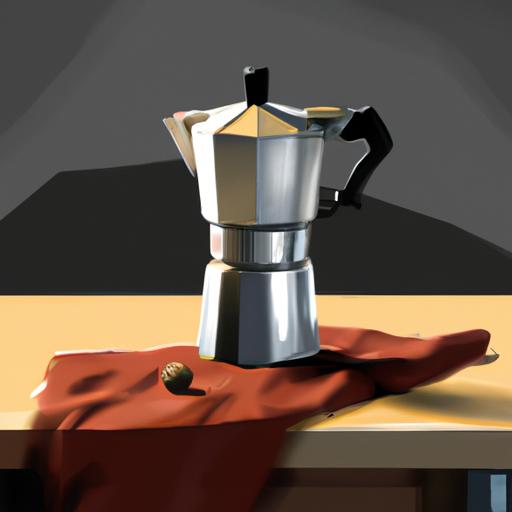
What is a Moka Pot?
A Moka Pot is an Italian-style stovetop coffee maker that is used to make espresso-style coffee. It is made up of three separate parts: the bottom chamber that holds the water, the filter basket which contains the finely ground coffee, and the upper chamber that collects the brewed coffee. The Moka Pot works by heating the water in the bottom chamber, which creates steam pressure that forces the water up through the coffee grounds into the upper chamber. The result is a strong, full-bodied espresso-style coffee that is perfect for making lattes, cappuccinos, and other coffee drinks. When using a Moka Pot for the first time, it is important to understand the basics of how it works and the best practices for making a delicious cup of espresso.
Gather Your Supplies

Brewing a perfect cup of espresso with a moka pot is easier than you might think! Before you begin, make sure you have all the necessary supplies.
You’ll need a moka pot, a stovetop or electric burner, cold water, finely ground coffee, and a cup or mug to serve the espresso in.
Once you have gathered all your supplies, you’re ready to begin!
The first step is to fill the lower portion of the moka pot with cold water, making sure not to fill it past the safety valve.
This valve is usually indicated by a line or a dot on the inside of the pot.
Once the water is in, you can start adding the coffee.
Place the filter basket into the lower portion of the pot and fill it with finely ground coffee, lightly tamping it down.
Screw the top of the pot onto the lower portion and place it on the stovetop over medium heat.
Now the fun part begins! As the pot heats up, you will start to see steam and hear the sound of the water boiling.
This is a sign that your coffee is moving up the chamber into the upper portion of the pot.
Once the coffee is ready, turn off the heat and let the pot cool for a few minutes.
Your espresso is now ready to be served! Carefully pour it into a cup or mug and enjoy the rich flavor of your freshly brewed espresso.
Step 1
Using a moka pot for the first time can be intimidating, but with a few simple steps, you can quickly make a delicious cup of espresso.
To get started, fill the lower portion of the moka pot with cold water, making sure to not fill it past the safety valve.
You want to make sure you dont overfill it, as the water will expand when heated and can cause the pot to leak.
Once the lower portion is filled, add the filter basket and fill it with finely ground coffee, lightly tamping it down.
Then, screw the top portion onto the pot and place it on the stove over medium heat.
As the water is heated, it will create steam that will force the coffee up into the upper chamber.
You will know its ready when the coffee starts to fill the upper chamber and you hear the iconic gurgling sound.
Once the coffee is ready, turn off the heat and let the pot cool for a few minutes.
Finally, pour yourself a delicious cup of freshly brewed espresso and enjoy!
Step 2

Once the lower portion of the moka pot is filled with cold water (making sure not to go past the safety valve), it’s time to fill the filter basket with finely ground coffee.
Be sure to use a good quality espresso blend, as this will affect the flavor and strength of your espresso.
When adding the coffee, make sure to use a tamper to press down the grinds lightly.
This will help ensure an even extraction and a balanced flavor.
Once the coffee is in the filter basket, place it back into the lower portion of the pot and screw the top portion of the pot onto the bottom.
Step 3
Once the lower portion has been filled with cold water, it’s time to fill the filter basket with finely ground coffee.
It’s important to use freshly ground coffee for the best flavor, so make sure you grind your beans just before using them.
You should also make sure to tamp the coffee down lightly, as this helps ensure that the water is evenly distributed throughout the pot.
Once the filter basket is filled, place it into the lower portion of the pot and screw the top onto the pot tightly.
At this point, you’re ready to place the pot onto the stove over medium heat.
As the pot begins to heat up, you’ll notice the heat creating steam inside the pot.
This is what will move the coffee up into the upper chamber, so it’s important to watch the pot closely.
Once the coffee begins to move up, turn off the heat, and let the pot cool for a few minutes.
After the pot has cooled, you’ll be ready to pour a delicious cup of espresso.
If desired, you can add milk, sugar, or other flavorings to turn it into a more traditional espresso drink.
Enjoy!
Step 4

Once the steam has started to move the coffee up into the upper chamber of the pot, its time to turn off the heat.
This is a crucial step in the process, as leaving the pot on the stove for too long can result in a bitter, burnt taste.
Keep an eye on the pot, as the espresso will become ready when the steam has fully pushed the coffee up into the upper chamber.
As soon as you see the espresso in the upper chamber, turn off the heat and let the pot cool down for a few minutes.
During this time, the espresso should settle and the flavor should become more balanced.
Then, youre ready to pour a delicious cup of espresso.
Enjoy!
Step 5
Once the coffee is ready, it’s time to turn off the heat, let the pot cool for a few minutes, and pour a delicious cup of espresso.
To ensure the espresso is at its best flavor, it’s important to let the pot cool for a few minutes before pouring.
The espresso will be extremely hot, so be sure to use a pot holder or oven mitt to protect your hands.
Once the pot is cool enough to handle, carefully pour the espresso into a cup or mug.
Enjoy your freshly brewed espresso!
Final Thoughts
By following the steps outlined above, you are now ready to make your first cup of espresso using a moka pot.
With practice, you will be able to make deliciously smooth espresso with ease.
So what are you waiting for? Gather your supplies and start creating your own espresso masterpieces!